
Ceramic Tile Installation
How To Install Ceramic Tiles On Concrete Floor ?
In this article, you will learn how to install ceramic tiles on concrete floor. The ceramic tiles are installed on the concrete slab in six easy to implement steps.
The concrete floor includes the newly constructed room having concrete floor slab or any room with concrete floor. This method is also applicable for the installation of ceramic tiles after the removal of the existing floor tiles.
The ceramic tile installation process on concrete floor can be done in six easy steps as follows.
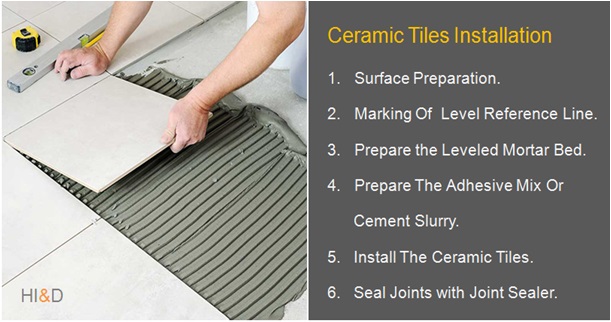
Ceramic Tiles Installation Process
- The first step is the concrete surface preparation.
- The second step is to mark the reference line with level pipe.
- The third step is to prepare the leveled mortar bed for tile installation.
- The forth step is to prepare either tile adhesive mix or cement slurry.
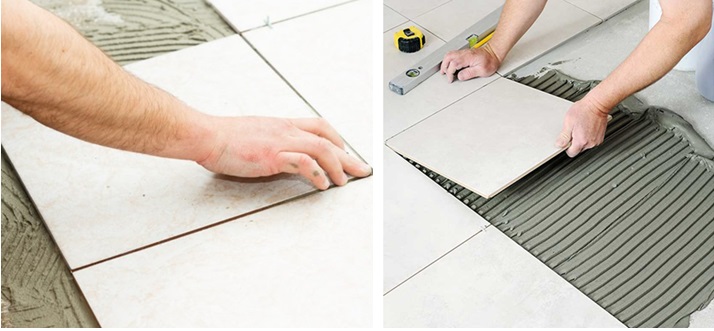
- The fifth step is the installation of ceramic tiles on the mortar bed.
- The sixth step is to seal all the tile joints with joint sealing mix.
Unlike other home improvement DIY projects, the successful execution of the tile installation depends upon three factors.
First critical factor is the knowledge of the entire tile installation process. The second factor is to use the correct tools. The tools can make a huge difference.
And finally, you also need to select the right material, and use the techniques necessary to achieve the professional quality results.
Before we dive into the details of each of this step, let us take a quick look at the tools and material needed for the job.
How To Install Ceramic Tiles On Concrete Floor ?
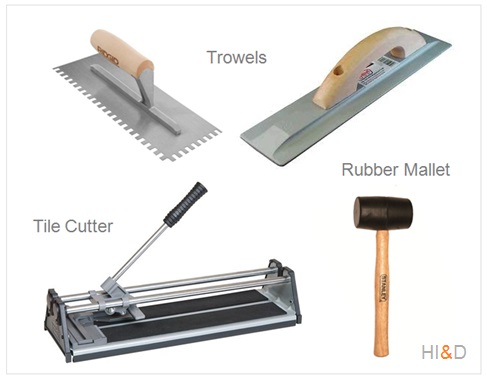
Tile Installation Tools
The list of tile installation includes many tools. However, these are the basic tools necessary to perform any DIY tile installation project.
- 1. Set of Trowels.
- 2. Level Pipe & Sprite Level.
- 3. Tile Cutter.
Materials For Tile Installation
The list of materials for tile installation includes very few items. The basic materials necessary to execute any DIY tile installation project include following materials.
- 1. Ceramic Tiles.
- 2. Fine Sand.
- 3. Cement Or Adhesive Mix.
- 4. Tiles Joint Sealer.
How To Install Ceramic Tiles On Concrete Floor ?
Step - 1
Concrete Surface Preparation
How To Prepare The Concrete Floor Surface For Tile Installation ?
The concrete surface preparation is the first step and an important step before starting the tile installation work.
The concrete surface preparation involves complete removal of the surface lumps from the concrete surface of the slab.
Similarly, all the corners and the joints of the wall and the floor slab should also be cleared of any lumps present.
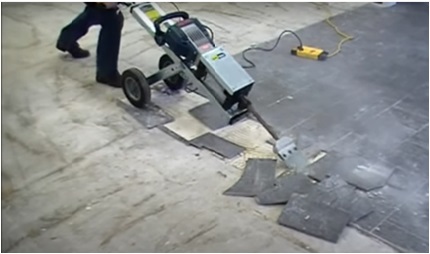
You can use any suitable power tool, or chisel and hammer to clear the concrete surface from any excess concrete or mortar lumps leftover during the construction work.
Likewise, the existing tiles can also be removed using power tools If you decide to remove the existing floor.
All the loose material should be removed and the concrete surface is now ready for the next step.
The surface preparation for tile installation also includes the complete removal of the existing flooring. However, this decision depends upon the condition of the existing floor and the headroom available.
How To Install Ceramic Tiles On Concrete Floor ?
Step - 2
Marking Level Reference Line
Marking Of The Reference Line On Walls For Tile Level
The next step is to mark a reference line on the wall surface along all the walls of the room with the help of level pipe.
This line marked on all the walls works as a level reference line to ensure that all tiles are installed perfectly at level surface.
The height of this reference line is kept usually 9 inch to 12 inch above the concrete floor slab surface. The tile surface level can be checked by measuring the inverted level measurements.
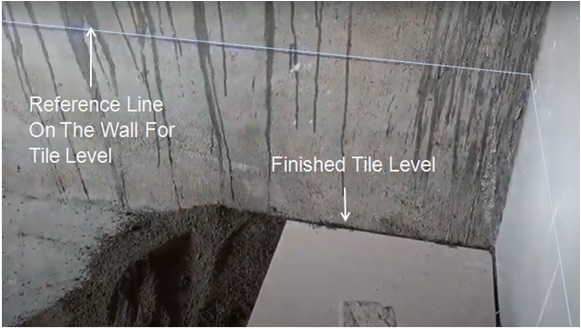
A long nylon thread is used during the tile installation process to check the top level of the tile surface.
This is a simple but very accurate method to check the tile level. A nylon thread is used that connects the two opposite marked reference lines on the wall.
Alternately, you can also use different types of surface level measurement tools available in the store. A compact sprite bubble level with laser pointer is also quite a handy and accurate tool for measuring the tile level.

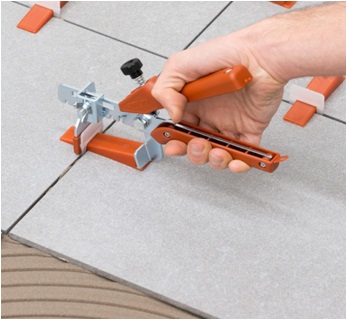
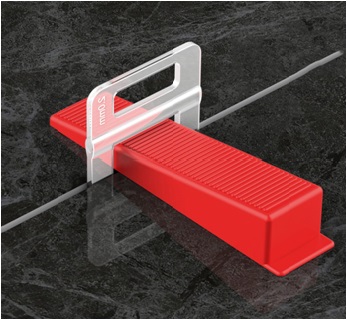
The tiles can have minor variations in size and the level. And therefore, the use of tile level system is another effective solution to manage this problem.
The tile level pins are used during the installation process to adjust the minor variation in the tile level.
The tile level measurement is a very important step of the tile installation work. The finished floor levels of the adjoining room should also be taken into account while deciding the level of the tile installation.
How To Install Ceramic Tiles On Concrete Floor ?
Step - 3
Preparation Of Mortar Bed
How To Prepare The Mortar Bed for Tile Installation ?
For Tile Installation With Cement
The next step is to prepare the leveled mortar bed. This method is applicable if the tiles are installed with cement ( OPC ).
A lean mortar is prepared using the sand and the cement. A level mortar bed is prepared usually 2 to 3 inch thick with the help of a long rectangle shape trowel rod.
The long rod trowel ( or aluminium rectangle profile 6 feet long ) ensures that the mortar bed is perfectly leveled with reference to the level reference lines marked on the walls.
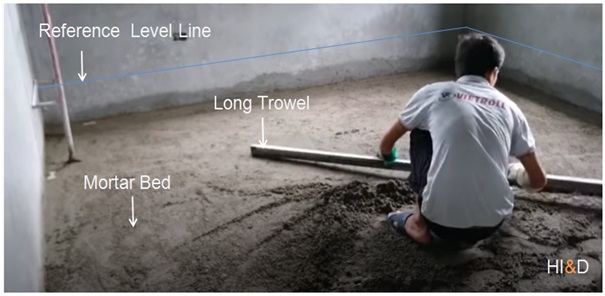
The main purpose of this mortar bed is just to provide the level surface. The tiles can be easily installed on this level surface.
The surface level of this mortar checked by measuring the inverted levels from the reference line marked all along the walls.
For a room, the floor tiles can be fixed without keeping a slope. However, for bathroom and other wet areas, a proper slope must be kept.
The leveled mortar bed surface is now ready for the tiles to be installed.
The next step is the tile installation.
Tile Installation With Adhesive Mix
The ceramic tiles can also be installed with special adhesive instead of using the cement.
If you are planning to use the tile adhesive then preparation of the mortar bed is not required.
However, you can level the concrete surface with thin layer cement plaster ( Ratio 1: 4 ) and the tiles can be installed with adhesive next day .
The special tile installation adhesive is readily available sold by many brands. The properties of the tile adhesive depend upon its technical specifications.
The next step is the installation of tiles.
How To Install Ceramic Tiles On Concrete Floor ?
Step - 4
Preparation Of Adhesive mix Or Cement Slurry
The ceramic tiles can be installed either with cement mix or tile adhesive mix. The preparation for both the mix is bit different.
How To Prepare The Cement Slurry Used For Tile Installation On Mortar Bed ?
If you choose to install the ceramic tiles with cement on mortar bed then it needs to be fixed with cement slurry.
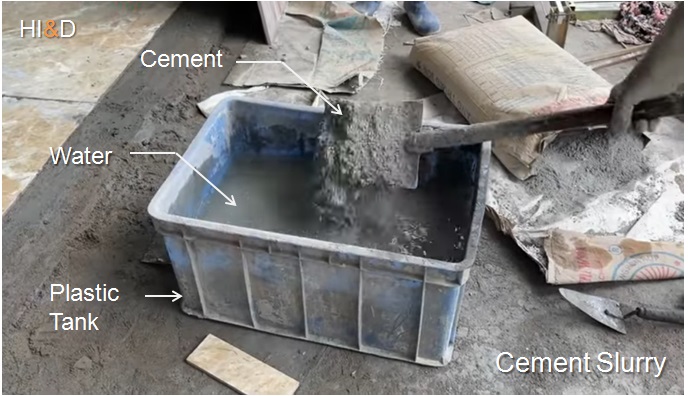
The ceramic tiles can be installed on the floor with the help of cement slurry. The cement slurry is prepared by mixing the water with cement ( OPC ).
The cement slurry should neither too thick nor too thin. The proportion of cement slurry used to install the tiles is one part of cement mixed with one and half part of water. For example, 1Kg of cement mixed with 1.5 liters of water.
The cement slurry once prepared must be consumed within one hour. Before the initial setting time of the cement is normally 60 minutes that depends upon the cement grade.
How To Prepare The Adhesive Mix Used To Install Tiles On Concrete Floor ?
Depending upon the situation, you can either select to use the cement or the special tile adhesive mix for the tile installation.
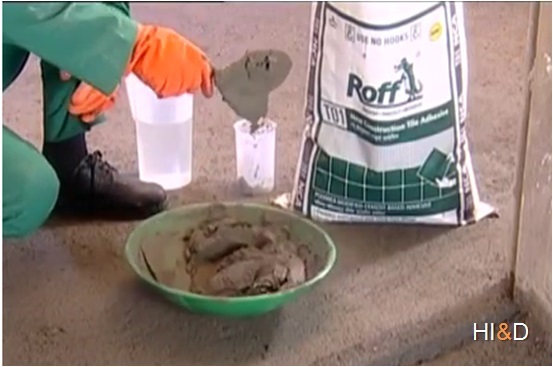
Most tile adhesives are water based and supplied in the powder form just like cement.
The preparation of the adhesives is done as per the product usage instructions mentioned on the adhesive bag or container.
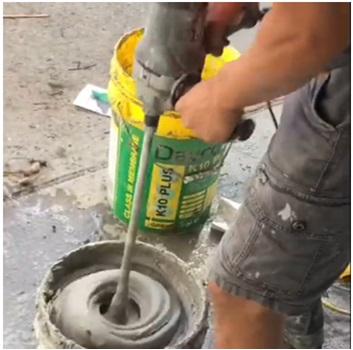
The tile adhesive is polymer based cement product. For the best results, a handheld cement mixer should be used to prepare the adhesive mix.

Different types of tile adhesives are available in the store with different technical specifications. For example, for the rapid hardening adhesive the initial setting tile is very less.
How To Install Ceramic Tiles On Concrete Floor ?
Step - 5
Tile Installation Process
After the surface preparation is completed, the next step is the actual installation of the tiles. The tiles can be installed either using the cement or the special tile adhesive mix.
Let us understand the tile installation process in each case.
How To Install Ceramic Tiles On Concrete Floor With Cement ?
The ceramic tiles are installed on newly prepared mortar bed with the cement slurry. The mortar bed should be wet and not hardened.
The mortar bed should be free from the pebbles. The tiles develop crack during the installation process if pebbles are present into the mortar bed.
The tile installation starts with first installing the one tile each at the four corners of the room.
These tiles are fixed with reference to level line that has already been marked on the wall surface ( Refer Step 2 ).
The ceramic tile body easily absorbs the water. The porous ceramic tile body helps to form a good bonding with the cement slurry.
And therefore, it is important to soak the ceramic tiles at least for few hours before its installation.
For tile installation, mix and pour the cement slurry on the mortar bed. The cement slurry also partially penetrates into the mortar bed.
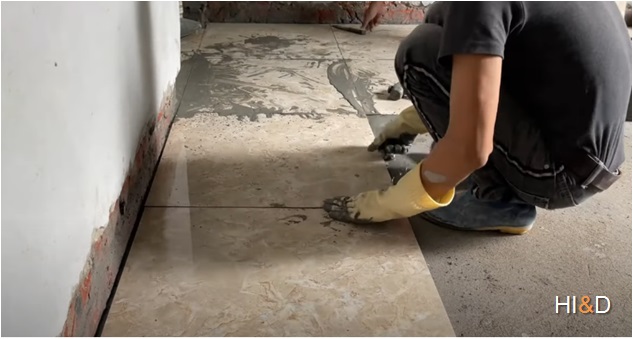
The tiles are installed in one line and placed on the mortar bed with cement slurry. The tiles once placed on the mortar bed are lightly tapped with the help of rubber mallet to ensure its bonding.
At this stage, while installing the tile, the tile spacers can be used to ensure uniform spacing between the tiles. The use of tile spacers is highly recommended that offers many advantages.
It is important to check the top surface level of the tiles all the time during the installation process. You can also make use of tile level pins readily available in any home improvement store.
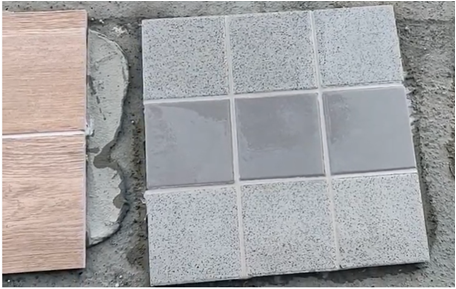
For small size tiles, the installation process is relatively easier. However, for large format tiles the level management is crucial to avoid any air pockets beneath the tiles.
How To Install Ceramic Tiles On Concrete Floor With Tile Adhesive ?
The ceramic tile installation process on the concrete surface is similar to the tile installation process with the cement.
For tile installation with adhesive mix, the cement mortar bed is not required and you can directly install the tiles on the concrete floor.
However, if the concrete floor is not perfectly in level then it needs to first brought to level with thin layer of rich cement mortar. The adhesive mix can be used directly only on the level concrete floor.
As discussed in step 2, the concrete surface is leveled with a thin layer of rich cement mortar. This is just to provide the uniform leveled concrete surface.
The ceramic tiles are directly installed on the concrete surface using the tile adhesive mix. Different brands of tile adhesive mix are available with various technical specifications.
If you are installing the tiles for the first time as DIY project, then the rapid hardening adhesive is not recommended. The normal mix will give you more time for the tile installation.
The rest of the installation process remains the same as that of installation with the cement mix.
Important Tips
Avoid walking on the newly installed tiles at least for first 48 hours. This might disturb the tile level and some tile corners can be pushed downward.
The newly installed floor tiles should not be subjected to any heavy load such as wardrobes , beds , tables or any other heavy furniture. The tiles installed with cement slurry usually takes seven days to gain reasonable strength.
After the ceramic tile installation is complete, the tiles need to be thoroughly cleaned to remove any dirt or cement left over on the tile surface.
The adhesive mix stains on the tiles must be cleaned immediately after the tile installation. The wet cement or adhesive mix left on the tile surface can permanently stain and damage the look of the tile flooring.
How To Install Ceramic Tiles On Concrete Floor ?
Step - 6
Sealing the Tile Joints
How To Seal The Tile Joints With Grout ?
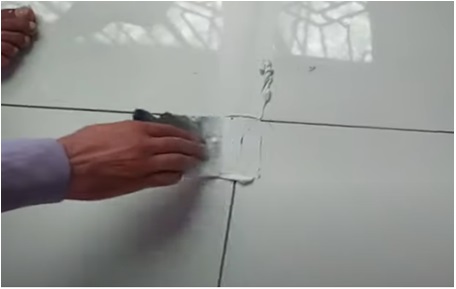
After the tiles are installed, the next step is to seal all the joints with joint sealing compound.
The process is simple. Just clean the joints and seal it with grout. Finally, apply a coat of epoxy joint sealer on the grout surface.
The ceramic tile joints can be sealed using different methods. The simplest method is to seal the tile joints with either white or gray cement.
You can match the color shade of the tiles by mixing the white cement with color stainer to get the desired shade.
The second method is to seal the joints using a special tile grout mix readily available in the store.
How To Apply The Epoxy Sealer Coat On The Tile Joints ?
After sealing the tile joints, it is advisable to seal the joints with epoxy tile joints sealer coat.
Different types of epoxy tile grout sealer are available in the store. This coat creates a water proof film on the grout surface.
The epoxy coat on the tile joints offers many advantages. It prevents the accumulation of dust in the joints. It also handles many maintenance issues associated with the tile joints.