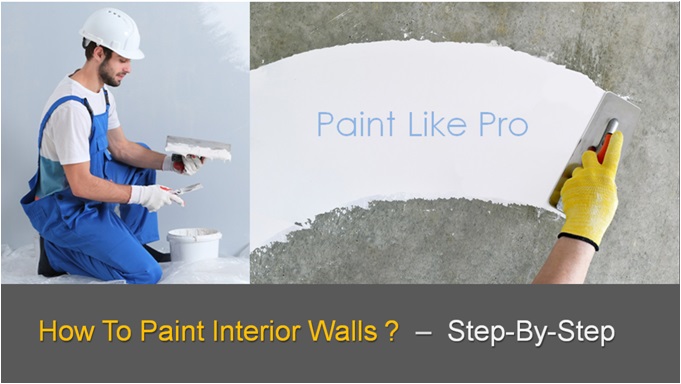
How To Paint Interior Walls ?
Complete Home Improvement DIY House Panting Guide
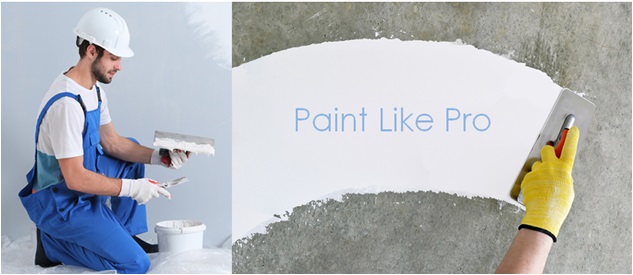
How to paint interior walls is the most favorite common topic for home improvement home improvement DIY project. It appears simple but achieving the pro result needs skill, technique and the right selection of material and tools.
It is important to understand the technically correct procedure about how to paint interior walls. It is relatively mush easier to achieve the professional quality results if you invest some time before you start your wall paint DIY project.
You will also feel more confident with the knowledge and understanding of the correct procedure for painting the interior walls. This information will also help you in sourcing the right material and tools for your DIY project.
The selection of right paint materials and the knowledge of the technically correct painting process is essential for the success of your DIY project.

After following this wall painting process, you can be rest assured of the stunning looks and professional quality of the final painting work.
Needless to say , you need to first clear the room, remove the existing furniture, and ensure adequate ventilation during the painting process.
Further, It is equally important to mask and cover the existing fixed gadgets ( AC , ceiling fans ) and the electric switch boards by masking them with masking material readily available in the market.
Let us first start with understanding the correct technical procedure to paint the interior walls.
How To Paint Interior Walls ?
List Of Wall Paint Materials
You will need following materials for the interior wall paint DIY project.
- 1 : Wall Putty.
- 2 : Wall Primer Paint.
- 3 : Selected Wall Paint.
- 4 : Sandpaper.
- 5 : Wall Crack Sealant.
- 6 : Wall Primer Paint Thinner.
- 7 : Wall Paint Thinner.
- 8 : Masking Tape.
Wall Painting Tools
You will need following tools required for the interior wall paint DIY project.
- 1 : Wall Putty Knife.
- 2 : Step And Extension Ladder.
- 3 : Wall Scrapping Tools.
- 4 : Long Handle Brush.
- 5 : Roller Brush With Drip Tray.
- 6 : Bristle Brush For Paint.
- 7 : Paint Blender.
- 8 : Empty Paint Containers.
How To Paint Interior Walls ?
Step-By-Step Procedure To Paint Interior Walls
You can achieve the professional quality results for interior wall paint DIY project by implementing the following easy to follow steps.
- Step 1 : Wall Surface Preparation Before Painting Wall.
- Step 2 : Sealing the Cracks On The Wall Surface.
- Step 3 : Mask the Doors, Windows , Elect Boards..
- Step 4 : Apply The First Coat Of Primer Paint.
- Step 5 : Apply Two Coats Of Wall Putty.
- Step 6 : Make The Wall Surface Smooth With Sandpaper.
- Step 7 : Apply The Second Coat Of Primer.
- Step 8 : Apply Two Coats Of Wall Paint.
- Step 9 : Perform Unmasking And Cleaning Operation.
STEP - 1
Wall Surface Preparation
Wall Surface Preparation For Interior Wall Paint
The first step of the wall painting work consist of preparation of the wall surface for the painting work.
This is a very important step and the wall surface must be prepared as per the recommended procedure to avoid any future problem of early peeling of wall paint.
The wall surface preparation is done by applying a layer of special wall putty on the wall surface. This is done prior to the actual application of the wall paint.
This wall putty layer plays an important role and works as a foundation layer for the wall paint.
Surface Preparation For Existing Walls
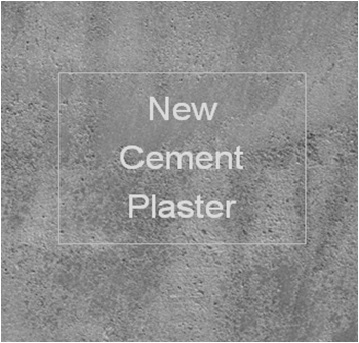
Surface Preparation For Cement Plaster
Any procedural lapses and short cuts in the preparation of the wall surface can lead to early peeling of the paint and reduced life of the wall paint.
The painting work for the interior walls can either be done on the existing painted walls or on the newly constructed plastered wall surface.
Let us discuss both the situations.
How To Paint Interior Walls ?
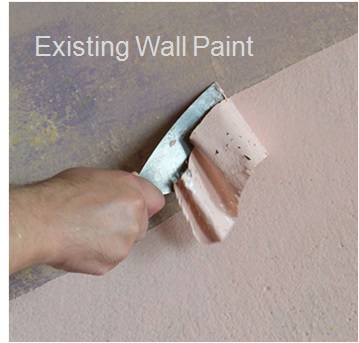
Surface Preparation For Walls With Existing Paint
Removal Of The Existing Paint.
If the existing paint is in good condition then the existing paint removal may not be required. But this is tough call.
However , if the budget permits and you are using expensive luxury paint then removal of the existing paint is a recommended practice.
The removal of the existing paint takes some additional time but it pays in the long run. If you have selected a luxury paint then It is important to first completely remove the existing paint.
The easiest way to remove the existing painting is by spraying the warm water on the existing paint and allowing the paint to soak for some time. The existing paint then can easily be removed by using any scrapping blade.
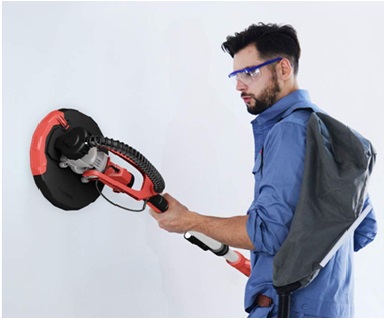
However , now a day’s most professional painting contractor use an electrical handheld sanding machine to remove the existing paint.
These machines have a rotating disc with sandpaper and a vacuum suction pipe that collects all loose dust into the dust bag. You can also get this machine on rent for few days.
After the removal of existing paint, the wall surface sanding job is completed. All the loose particles are removed . The wall surface after the sanding job should cleaned to clear all the loose particles.
At this stage, all the wall cracks, every hole, ridges must be sealed with crack sealant compound before the application of the first primer coat.
The wall surface area is now ready for the application of the first coat of cement primer.
Important Tips
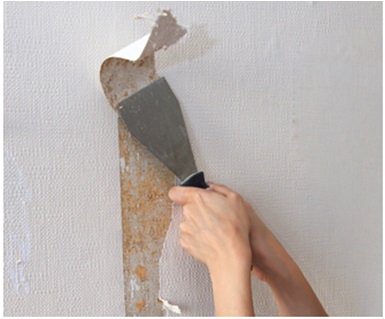
For the removal of the stubborn existing paints, special paint stripper paint thinners are available in market.
These special purpose paint strippers are first applied on the existing paint and the existing paint can be easily removed using the putty knife.
Surface Preparation For Cement Plaster Wall
The wall painting for the newly plastered wall surface can be done only after the initial curing period of the plaster is over. This period is usually at least fifteen days in sunny dry weather.
For best results, the new plaster wall surface should be completely dry and there should not be any dampness present in the wall.
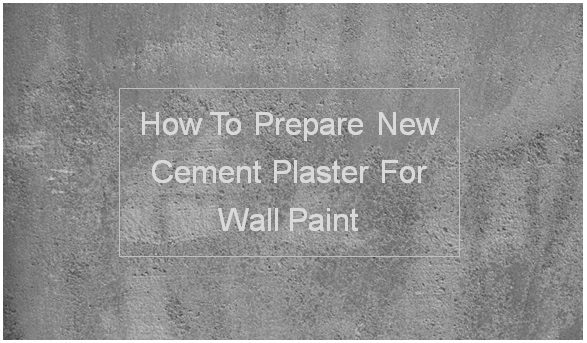
The plaster surface is first cleared and any lumps present are removed using either a putty blade or trowel. The plaster surface is then rubbed by using a sand paper to clear the dust.
The wall surface after the sanding job should cleaned to clear all the loose particles. At this stage all the cracks , every hole , ridges must be sealed with crack sealant compound before the application of the first primer coat.
The wall surface area is now ready for the application of the first coat of cement prime.
How To Paint Interior Walls ?
STEP - 2
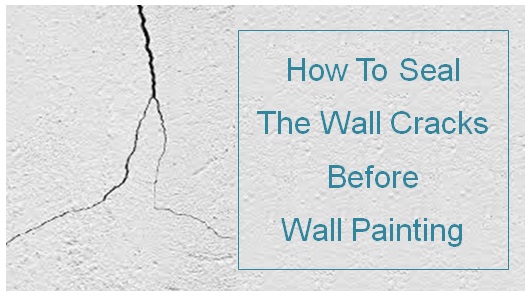
Sealing The Cracks
How To Seal Wall Cracks Before Painting Wall.
Most walls develop random small cracks over a period of time due to ageing of the building and some other factors.
These cracks must be properly treated before starting the painting work. It is recommended practice to open these cracks with some sharp pointed scrapper tool. The cracks are sealed with wall crack sealant material.
There are many reputed wall crack sealant products readily available ( Amazon , Walmart ) in any home improvement store or hardware shop.
The wall surface cracks can also be sealed by using the POP ( Plaster Of Paris , Gypsum Plaster ). However, the crack sealant material will give you much better results.
After sealing the wall cracks, the next step is to level these cracks by sanding the wall surface with the fine sandpaper.
At this stage, all the holes on the wall surface must be sealed, ridges must be removed and leveled by using the special crack sealant compound to get the uniform smooth wall surface.
The wall surface is now ready for the application of first coat of the cement primer.
Important Tips
It is important to seal all the cracks , patch up the holes , clear ridges and properly seal with crack sealant product readily available in the market.
Any undulation left on the wall surface will be prominently visible on the application of the wall paint. And therefore, it is absolutely necessary to properly prepare the wall surface as per the recommended process.
How To Paint Interior Walls ?
STEP - 3
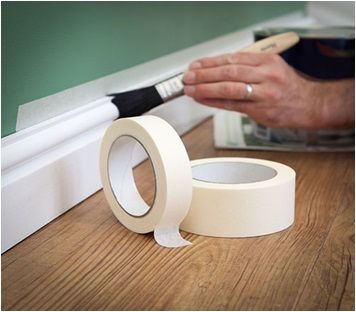
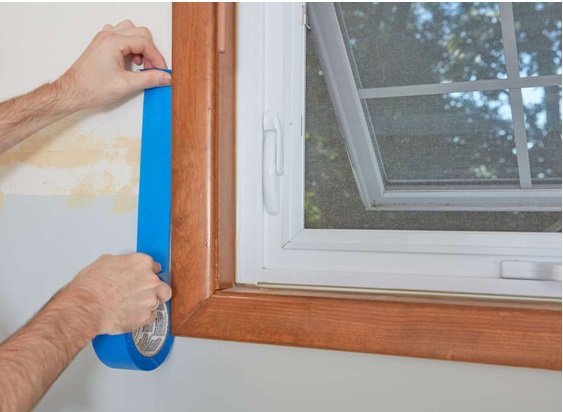
Masking Operation
Mask The Doors, Windows And Electric Switchboards
It is important to mask and completely cover the doors, windows, electric switchboard, air-conditioner or any other gadget that you don’t want to be spoiled by unwarranted painting spots.
You can use any material such as used news papers , polyethylene paper or any such material that can be easily discarded after the completion of the painting work.

Important Tip
It is very difficult and painful process to remove the paint stains if the masking is not done properly. The paint stains can also damage furniture.
And therefore, all surfaces that needs to be protected by masking with suitable masking material. The masking material is also readily available in any home improvement store.
You can use the masking paper tape to stick the masking paper on the wall surface. The masking tape does not peel off the paint when you unmask the objects after the painting job is completed.
You can also use old news paper as masking paper for covering the windows , doors , electricity boards and switches , fans , AC and other Gadgets .
How To Paint Interior Walls ?
STEP - 4
Application Of First Primer Coat
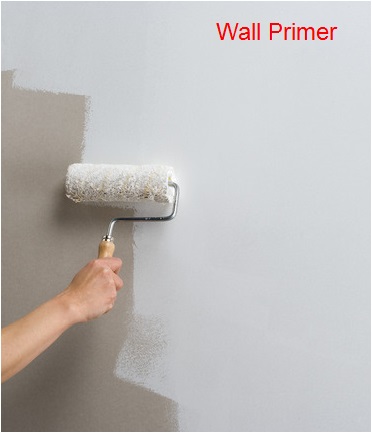
How To Apply The Primer Coat On Interior Walls ?
The cement primer plays an important role in the painting process. The application of cement primer is an important step.
The primer is a special type of paint that binds the wall putty layers with the wall surface. The first coat of the primer is applied before the application of wall putty layers.
The cement primer is necessary to ensure the perfect bond between the wall surface and the layer of the putty used to make the wall surface smooth.
The wall primer can be applied either by be applied by brush or by roller or by spray gun. However , the application by spray gun will give better result.
The wall surface primer coat should allowed to dry completely for a period of at least 6 to 8 hours after the application of primer coat.
You can start the application of wall putty layers after the primer coat is completely dried.
Important Tip
Some ready to use wall putty products specifically mention not to apply the cement primer coat prior to applying the putty coats on the wall surface .
In such cases, you can directly apply the putty coats on the wall surface. Please check the product description while buying the ready made wall putty or consult your painting contractor.
After the wall surface is painted with cement primer and it is completely dried , the wall surface is now ready for the application of two to three coats of putty.
You either use a normal paint brush ( 4 Inch ) or paint spray gun or roller brush for the application of cement primer coat.
Two types of primer paints are available in the market. The first type is water soluble and second type is thinner ( any oil paint thinner ) soluble. However, the thinner soluble primer gives the best results.
How To Paint Interior Walls ?
Home Improvement DIY Projects
STEP - 5
Application Of Wall Putty Coats
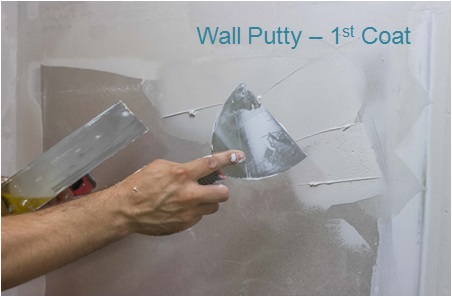
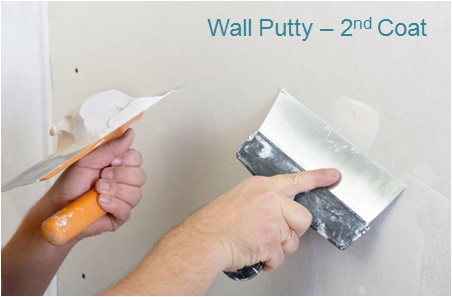
How To Apply Wall Putty On The Interior Walls ?
The wall putty is used to smoothen the wall surface. In most cases two to three coats of wall putty coats are sufficient to smoothen the wall surface.
However , if the wall surface is very uneven then a thin coat of POP and white cement can be applied to level the wall surface before the putty layer.
The wall putty is readily available in the market in any home improvement store or hardware shops.
Alternately , you can prepare the wall putty by mixing putty powder and white oil paint . But It is highly recommended to use ready to use putty rather than making it yourself.
Important Tips
Some ready to use wall putty products specifically mention not to apply the cement primer coat before applying the putty coat on the wall surface .
In such cases, you can directly apply the putty coats on the wall surface. Please check the product description while buying the ready made wall putty or consult your painting contractor.
After the wall surface is painted with cement primer and it is completely dried , the wall surface is now ready for the application of two to three coats of putty.
You either use a normal paint brush ( 4 Inch ) or paint spray gun for the application of cement primer coat.
STEP - 6
Wall Putty Sanding Operation
How To Make Wall Putty Surface Smooth With Sandpaper ?
After the application of the two to three coats of wall putty , the next step is to make the putty surface smooth by sanding operation.
The sanding operation is performed on the completely dried putty layers applied on the wall. This is a crucial step that renders a smooth surface and removes the excess wall putty.
After performing the sanding operation on the final coat of the putty layer , you can expect a perfectly smooth surface. You can apply either the second coat of the primer paint or the first coat of the wall paint.
The putty surface should be cleaned with dry cloth to remove all the fine particles left after the final sanding operation.
Sandpaper Selection
How To Select Sandpaper For Sanding The Wall ?
The sandpapers available in the market can be of two basic types. The first type is dry sandpaper used on dry surfaces. The second type is wet sandpaper ( usually in black colour ) that can be used sanding wet surfaces.
You can use any sandpaper ( dry or wet ) but the wet sandpaper lasts more and also gives better results. The wet sandpaper is recommended for sanding the interior wall surfaces.
The sandpapers available in the market with different abrasive index specified by the sandpaper number. The most coarse sandpaper number starts from 60 to the finest 240 number.
Sandpaper Number | Type | Application |
40 | Extra Coarse | Used For first sanding operation on the very rough wall surface. |
60 | Coarse | Used For first sanding operation on the rough wall surface. |
80 | Medium | Used for removing the wall surface imperfections. |
120 | Fine | Used for sanding the wall putty layers prior to the application of primer paint. |
180 | Extra Fine | Used for sanding the final wall putty layer prior to the application of primer paint. |
240 | Super Fine | Used for sanding the final wall putty layer prior to the application of interior wall paint. |
How To Paint Interior Walls ?
STEP - 7
Application Of Second Primer Coat
How To Apply The Second Primer Coat On Interior Walls ?
The second and final coat of the primer is applied on the smooth wall putty surface after the sanding operation is complete.
The application of second coat is optional as some wall paint brands do not advocate the use of prior primer coat on the top of wall putty.
The paint technology has advanced and many top interior paint brands have introduced new interior paints. These paints can be directly applied on the wall putty surface without the application of primer coat.
The first coat of such wall paint itself work as a primer coat. In such cases , the wall paint can be directly applied on the finished putty surface.
However, the application of the second primer coat will increase the coverage of the wall paint.
STEP - 8
Application Of First Coat Of Wall Paint
How To Apply Interior Wall Paint ?
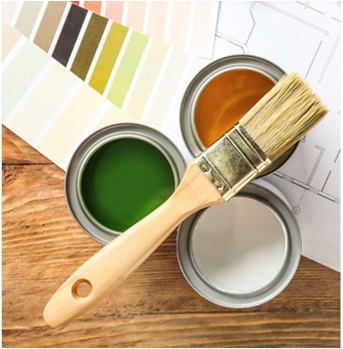
The application of the wall paint requires you to first decide the type of the paint you wish to apply.
Further, you also need to prepare the desired color shade of the wall paint. And finally, the method to be used to apply the wall paint.
Select The Type Of The Wall Paint
At this stage tour wall surface preparation is complete and ready for the application of the wall paint.
However, before the application of the wall paint, you need to first decide the type of the paint you wish to select. Different types of interior paints are available in the market.
Further, you have option either to use the readymade shade or you can prepare the desired colour shade. And finally, you also need to decide the method to be used to apply the wall paint.
How To Select The Interior Wall Paint
The selection of the type of the interior paint to be used mainly depends upon the budget and other factors.
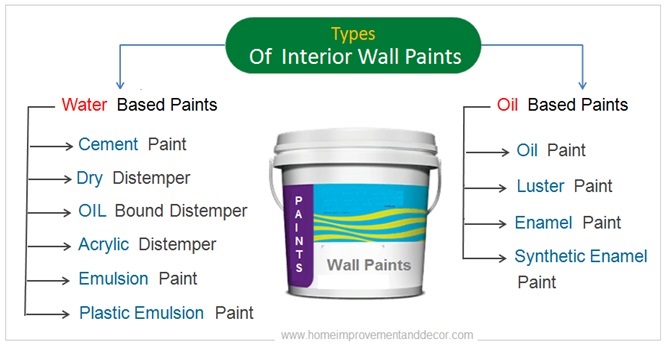
Different types of wall paints are available in the market. The paint type can be broadly grouped into two groups.
The first type of interior paints is a water soluble paints and the second type is thinner soluble paints. You simply use water in case of water soluble paints to get the required consistency.
However, for oil soluble paints, you need to add a specific oil paint thinner such as turpentine thinner readily available in all home improvement stores.
Some of the most popular and commonly used interior paint types include dry distemper paint , oil bound distemper paint, acrylic distemper , emulsion paint, plastic emulsion paint, oil paint and the luster paint.
The cheaper paints such as dry distemper or oil bound distemper can be directly applied on the cement wall surface. The economical cheaper paints can be applied directly without any putty coats.
However, the expensive luxury paints ( emulsion , plastic emulsion , luster paint ) need the proper wall surface preparation before the application of the interior paint coats for the best results.
The use of oil paint , enamel paints is not recommended for the interior walls. These paints render a high gloss surface finish.
How To Paint Interior Walls ?
How To Select The Color Shade ?
How To Prepare The Interior Wall Paint Color Shade
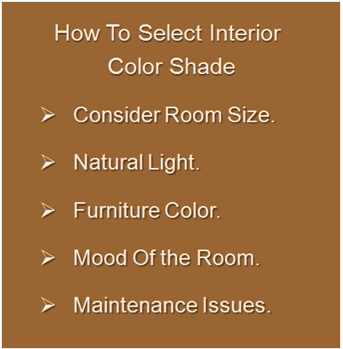
The selection of the correct interior paint colour shade is another very important decision. The color of the room has ability to instantly transform the look and mood of the room.
The color selection depends upon several factor. Such as room size, natural light, mood , furniture color , interior design style and the maintenance issues.
The selection of the paint shade is a matter of personal choice. However, there are some important factors that should be considered while selecting the correct color shade for the room.
As a rule of thumb, the light pestle shades on the walls helps the smaller room to look more specious.
Whereas, the darker shade may be used on one single wall highlight the specific objects, contrast and to introduce the bring play of colors.
The darker shade may be used in a room with large windows and doors . The white color windows and doors against the dark wall shade look create beautiful visual effect.
You can either buy the paint with ready made color shade as per the shade card or you can make the color of your choice.
Important Tips
Most reputed interior color brands offer large size color shade stickers. These stickers can be effectively used to assess the color shade.
It is important to make the color shade in the required quantity sufficient for first and final coat. Any change in the shade might look odd and such variation might be prominently visible.
Interior Paint Finishes
The interior paints are available in the market that can render different types of surface finishes. The interior paint finish is an important feature of the paint that affects the visual effect.
The most common interior paint finish include high gloss finish, semi-gloss finish, satin finish , matte or flat finish , eggshell finish and textured finish.
The gloss and semi-gloss finish paints are relatively easier to maintain. These gloss finish paint is also considered to be more durable.
On the other hand , the matte finish paint create a non glossy effect on the wall surface. However , the matte finish paints are relatively requires more care and maintenance.
Paint Finish | Finish Look | Durability | Scratch Resistance | Hides Imperfections | Maintenance |
Gloss |  | High | Low | Low | Low |
Semi-Gloss |  | Good | Moderate | Low | Low |
Satin |  | Moderate | Good | Moderate | Moderate |
Eggshell |  | Moderate | Good | Moderate | Moderate |
Matte |  | Low | High | High | High |
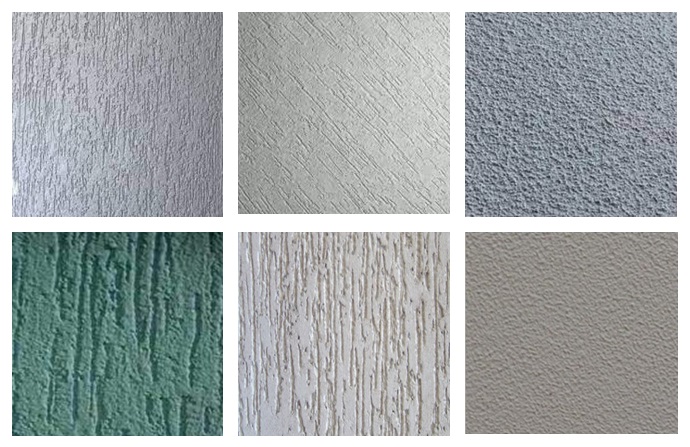
Interior Paint Texture
The interior paint texture is another important feature that should be considered at time of selecting the interior paint.
You can add texture to the painted surface by two methods. The first method used to give texture is the use of different types of roller brushes.
These special effect roller brushes are readily available in any home improvement store. You can get plenty of choice for roller brushes.
Most interior paint brands also offer special category of interior paints that renders different types of textures on the wall surface.
How To Paint Interior Walls ?
How To Apply Wall Paint ?
Wall Paint Application Techniques
The interior paint coats can be applied on the wall surface by using different techniques and methods.
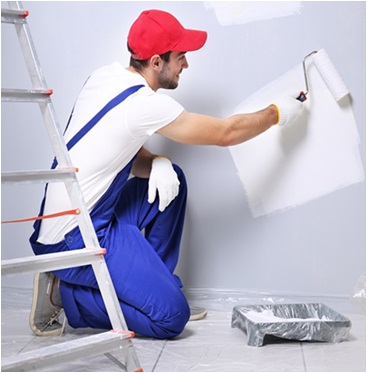
The interior wall paint can be applied by using either a paint brush or by a paint roller brush. It can also be applied by a spray gun. Each method has its pros and cons.
However , the roller brush with drip tray continues to be the most preferred option for the application of interior paints.
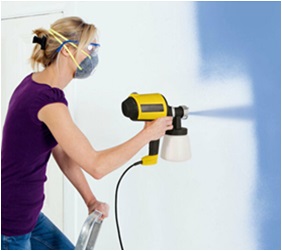
The spray gun option offers many advantages. It is also the preferred method due ease of use and the speed . The spray can cover large area with the uniform texture.
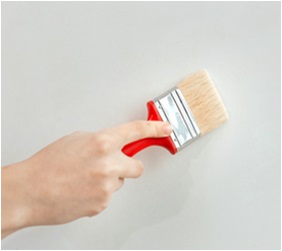
Wall Paint By Brush
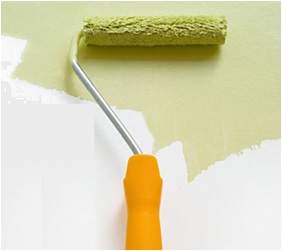
Wall Paint By Roller
Wall Paint By Spray Gun
Important Tips
The paint brushes continues to be the most common and preferred method used to paint the interior walls.
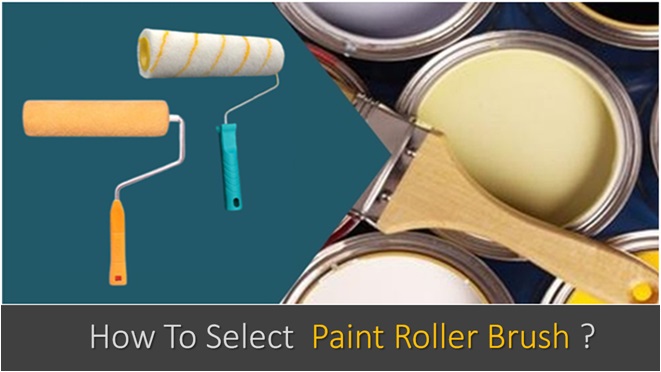
The selection of the right wall paint brush can make a big difference in the outcome of your DIY project.
Different types of wall paint brushes are available in the market.
Read More
Interior Wall Paint Process
Apply Two Coats Of Interior Wall Paint
So far we have covered in detail, how to paint the interior walls till the surface preparation stage. We have also discussed various interior wall paint finishes , textures and the methods used to apply the paint on the wall surface.
The wall surface at this stage is ready for the application of two to three coats of wall paint. The number of coats depends upon the paint type, color shade and the method used to apply the paint.
The room to be painted must be thoroughly cleaned and there should not be any dust left either on the floor or on the wall surface.
The paint coats can be applied either by using a painting brush , roller brush or by using a spray gun. Depending upon the skill , each of these methods can give different texture to the painted wall surface.
The room ceiling should be pained first. The wall painting work can be started after the ceiling paint work is complete. Some portion of the ceiling can be masked while painting the walls.
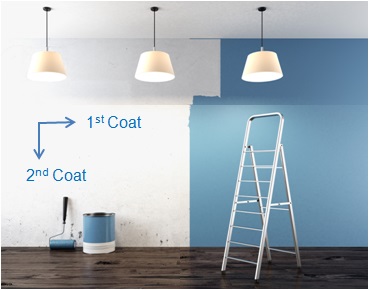
The first coat of the wall paint can be applied either horizontal or vertical direction. If the first wall pant is applied horizontally then the second coat should be applied in vertical direction to get uniform finish.
The second coat on the wall surface can be applied only after the first coat is completely dry. The second coat of the paint can be applied after a gap of at least eight hours.
Important Tips
If you are using a brush to paint the wall surface then the roller can be applied on the wet paint surface to give different textures to the wall surface.
Different types of wall paint rollers brushes are available in the market for imparting different texture to the wall surface.
For painting the wall at the ceiling edge and at the wall corners, special attachment brushes and rollers are available in any home improvement store.
If the first coat is applied in the vertical direction then the second coat should be applied in the horizontal direction to ensure uniform finish of the painted wall surface.
The room should be properly ventilated which allows the gases and fumes realized by the paint to get out of the room safely.
How To Paint Interior Walls ?
STEP - 9
Deep Cleaning After The Wall Paint Work
The prevention is always better than cure. The masking operation can substantially reduce your post painting cleaning efforts required after the paint work is complete.
The last step after the painting work is the deep cleaning operation. This step involves unmasking all the objects and removal of the all masking cover.
You can remove some minor paint stains left over with the help of either acetone or turpentine mild thinner to remove the minor stains.
Important Tips
The use of strong stain remover can cause permanent damage to your furniture, floor and other such surfaces at the time of cleaning operation.
The post painting work cleaning operation done by the painting contractor should be closely supervised to avoid any damage.