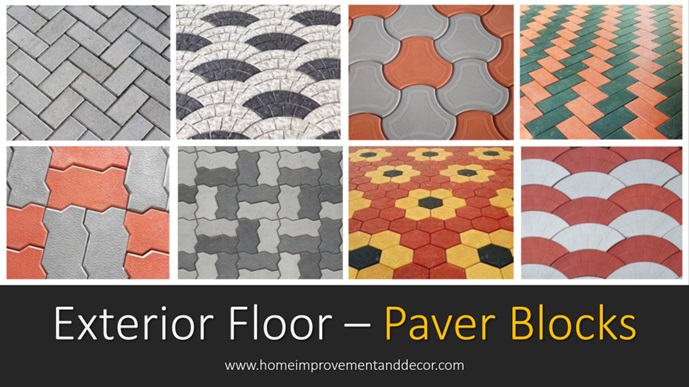
Paver Blocks Installation
How To Install Paver Blocks Flooring, Tools, Material And Installation Process Explained
If you are looking for a complete guide for Paver Block Installation process then this article is for you. Learn complete Paver Block Installation process. Paver blocks can be installed in eight easy to follow steps. Explained tools and material required.
Installing paver blocks is a popular option for creating durable and visually appealing flooring surfaces for parking areas, driveways, walkways, patios, and more. The success of a flooring project depends on the installation process and technical skills.
Proper installation ensures the long-term durability of the paver blocks. It helps create a stable and sturdy surface that can withstand heavy loads, foot traffic, and environmental factors.
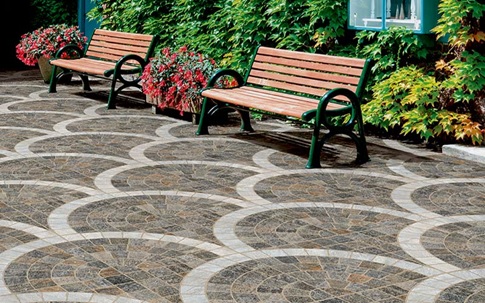
The installation process plays a crucial role in achieving an attractive and visually pleasing outcome. Proper alignment, uniform joint width, and consistent patterns enhance the overall appearance of the paved area.
The paver block shapes are designed in such a manner that the blocks are interlocked, which does not allow any lateral movement of the blocks. Therefore, blocks are simply installed on the specially prepared, firm ground without using any cement grout.
The interlocking property of the blocks ensures that they are firmly placed. This loose installation without using cement grout also allows for easy maintenance, and the damaged blocks can be very easily replaced.
Here’s a step-by-step guide on how to install paver blocks, along with some important tips and technical details:

The civil engineering terminology is a ready reckoner that includes the definitions of various technical terms used in the construction industry and home improvement DIY projects.
Concrete Floors - Paver Block Installation
Concrete Paver Block Installation Step-By-Step
- Planning And Preparation.
- Base Preparation.
- Base Material.
- Edge Restraints.
- Bedding Sand.
- Laying Paver Blocks.
- Cutting And Adjustments.
- Finishing Touches.
1. Planning And Preparation.
- Measure the area where you want to install the paver blocks and calculate the quantity of blocks required. ( Total number of blocks required = Total area / area of the one single block ) . You can use any unit of measurement. The area of the one single block is mentioned on the product description or can be obtained from the supplier.
- The strength of the paver blocks depends upon the grade of the concrete used to produce the blocks. The price of the blocks also depends upon the strength required. Therefore, the strength assessment must be done depending upon the traffic conditions that flooring must support.
- Mark the boundaries and remove any existing vegetation, debris, or old pavement. It is important to remove the roots of the large trees before the installation.
- All underground service lines such as drainage lines, electrical lines, plumbing lines must be first installed. It is important to for larger areas
- Check for proper drainage and make necessary adjustments to ensure water doesn’t accumulate on the surface. Uniform slope should be kept that is necessary for quick disposal of water.
2. Base Preparation.
- Excavate the marked area to a depth of about 8-10 inches (20-25 cm). The surface should be adequately compacted to ensure steady firm soil surface.
- Ensure the excavated area is slightly larger than the planned size to accommodate the base material.
- Level the excavated area using a rake or shovel. The soil must be treated for any other issues such as presence of soil termite.
3. Add Base Material.
- Blocks are directly installed on the layer of loose base material. Add a layer of granular material, such as crushed stone or gravel, to the excavated area.
- The thickness of the base material depends upon the strength requirements and traffic conditions. Compact the base material using a plate compactor or a hand tamper. Aim for a compacted base depth of around 2-6 inches (6-15 cm).
- Check the level using a straightedge and adjust the base as needed to ensure uniform thickness.
4. Install Edge Restraints.
- Install edge restraints along the perimeter of the excavated area to keep the paver blocks in place. Readymade precast restraints are available in various designs, sizes and shapes.
- The edge restrains must be firmly grouted using cement mortar or concrete. Use sturdy materials like concrete or plastic edge restraints.
- Secure the edge restraints firmly to the ground using spikes or anchors or by using cement grout or concrete.
5. Add Layer Of Bedding Sand.
- Spread a layer of bedding sand over the compacted base material.
- Aim for a sand layer thickness of about 1 inch (2.5 cm).
- Use a screed board or pipe to level the sand and create a smooth, even surface.
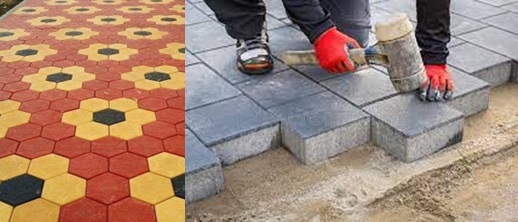
6. Laying Paver Blocks.
- Start laying the paver blocks from one corner or edge of the prepared area.
- Place each block tightly against the previous one, ensuring a consistent joint width (typically 1/8 to 1/4 inch or 3-6 mm).
- Tap the blocks gently with a rubber mallet to settle them into the sand bedding.
- Use a level or straightedge frequently to check the evenness of the surface.

7. Block Cutting And Adjustments.
- For edges and corners, you’ll likely need to cut some paver blocks to fit the desired shape.
- Use a diamond blade wet saw or a paver splitter for precise cuts.
- Make adjustments as necessary to maintain a uniform pattern and proper alignment.
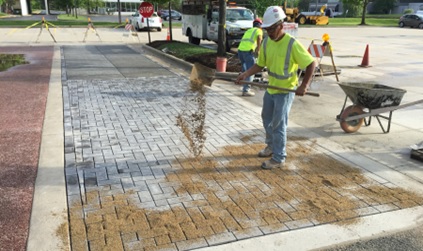
8. Finishing Touches.
- Once all the blocks are in place, spread fine sand over the surface and sweep it into the joints.
- Compact the paver blocks using a plate compactor to set them firmly into the bedding sand.
- Add more sand and repeat the compaction process until the joints are completely filled.
Concrete Floors - Paver Block Installation
Important Concrete Paver Block Installation Tips
- Select the correct grade of blocks to support loading conditions.
- Ensure the base preparation with compaction.
- Ensure proper gradient and drainage network to avoid water stagnation.
- Check local regulations and obtain any necessary permits before starting the installation.
- Choose high-quality paver blocks suitable for the intended use, load and climate conditions.
- Use a string or chalk lines as guidelines to maintain straight lines and proper alignment.
- Avoid walking or placing heavy objects on the freshly laid paver blocks until the project is completed.
Other Related Topics